API Blog Automation for Custom Websites
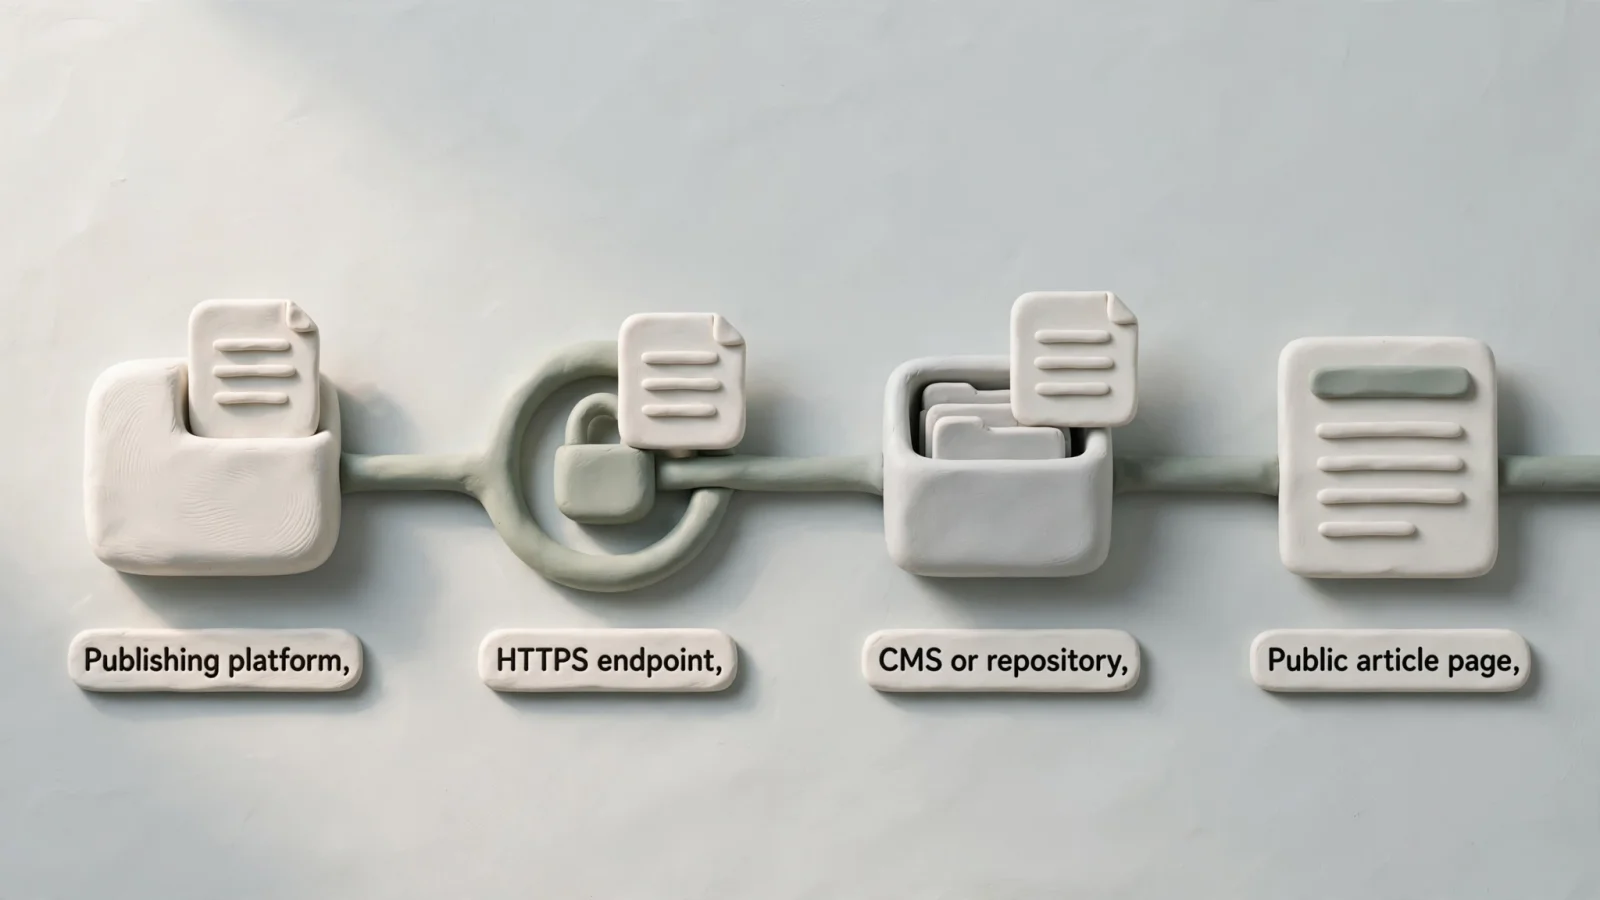
Moving content from a drafting environment to a live website requires a reliable connection. Implementing api blog posting automation for custom websites transforms an isolated text file into a publicly accessible page without manual copying and pasting. The publishing process follows a specific path: a publishing platform sends the content payload, an HTTPS receiver accepts that payload, and your database persists the article before serving it at a public URL. A custom frontend alone is not writable, because a React or Vue application running in a browser cannot save files directly to a server. The site requires a server-side destination or workflow that can accept and format the incoming data. While RankPine handles the generation, research, and scheduling, your website must be prepared to receive the delivery. You manage the endpoint, map the article data, and ensure search engines can discover the result.
How API Blog Posting Automation Works
A successful publishing integration relies on distinct systems communicating across secure boundaries. The publishing platform packages the text, images, and metadata into a standard format, which your website then accepts and translates into a native database entry or static file. Once the storage layer records the write, the web server makes the content available to users and crawlers at a dedicated URL. If the site relies on a content delivery network, the system must also invalidate older caches so visitors see the latest post.
Understanding the difference between calling an API and receiving a webhook clarifies the integration process. RankPine provides a REST API overview detailing programmatic access to your RankPine resources, meaning your application can pull keyword data or initiate generation. The publishing automation runs in the opposite direction. The RankPine Webhook / REST integration pushes published article data out to an endpoint you control. This mechanism prevents readers from mistaking the generation API for the destination website's own publishing API. You configure RankPine to send the payload, and you configure your server to passively listen for it.
Choose a Publishing Route for Your Site
Before writing any code or setting up credentials, determine where your content will live and who owns the integration. The required public URL structure and your team's capacity to maintain a receiver will dictate the best publishing route. A custom website does not automatically accept external content, so you must open a specific path for the data to enter.
| Route | Best fit | Main trade-off |
|---|---|---|
| Native CMS integration | The site uses a CMS with a supported connector | Usually avoids building a custom receiver; CMS-specific configuration still matters. |
| Custom webhook receiver | The site has its own backend, CMS, or publishing workflow | Offers control over storage, URLs, and rendering, but someone must build and maintain the receiver. |
| Hosted blog | There is no suitable publishing API and a separate subdomain works | Reduces integration work, but the blog is not mounted at the main site's /blog path. |
For WordPress, a third-party service can use Application Passwords to authenticate for API access. These per-application, revocable credentials are intended for API use over HTTPS, so the service can publish content without receiving the user's main account password.
When your site runs on a custom backend, a headless CMS, or a visual builder, you build a custom webhook receiver. Setting up Framer SEO blogging automation or a custom Node.js backend often requires this approach. You provide an HTTPS endpoint, and RankPine delivers a JSON payload containing the article. Your server must accept the request, map the incoming fields to your database schema, and trigger any necessary rebuilds. This route requires developer effort to maintain, but it provides complete control over how the article renders.
If your team cannot maintain a receiver and your site lacks a native connector, a hosted blog serves as a fallback. The RankPine Hosted Blog option deploys content to a custom subdomain. Pointing a DNS record to a hosted service removes the need for a local publishing API entirely. Because it does not mount directly at a main site path like /blog, confirm that a separate subdomain aligns with your URL structure before selecting this route.
Configure the Publishing Connection Step by Step
A reliable webhook connection requires a reachable endpoint, a validated payload, accurate field mapping, and a durable write operation. Skipping any of these steps results in dropped content, security vulnerabilities, or malformed pages. The integration must predictably handle successful deliveries, unauthorized access attempts, and duplicate requests.
1. Define the Endpoint and URL Model
Start by defining your site's content store and the rules governing public URLs, determining exactly how an incoming slug becomes a live address. If the webhook payload includes a slug named my-new-post, your routing logic must map that to example.com/blog/my-new-post. You also need a plan for slug collisions. If an article already exists with that identifier, your server should update the existing record, append a random number to the new slug, or return a conflict error. Furthermore, your server needs a dedicated HTTPS endpoint designed solely to receive incoming blog posts. This endpoint should accept POST requests and sit behind your standard security layers while remaining accessible to the external publishing platform. Configure the endpoint to expect a Content-Type: application/json header, and set reasonable payload size limits to prevent abuse from oversized requests.
2. Secure and Validate Incoming Requests
RankPine sends a verification ping when you first configure the connection, and your endpoint must return a 2xx status code to acknowledge it. Because this URL is public, you must ensure that only trusted sources can write to your database. Keep all credentials and secrets server-side, never exposing them in client browser code or public repositories.
The most secure verification method uses the optional HMAC-SHA256 signing secret. RankPine signs the raw request body using this secret, and your server computes its own signature based on the incoming raw bytes to compare against the provided signature header. Verify the signature against the original bytes before parsing the JSON payload. Many backend frameworks provide constant-time string comparison functions specifically to prevent timing attacks during this step. While you can also configure a custom header for identification, a shared secret provides cryptographic proof of the sender's identity. Reject any request that fails signature validation with a 401 Unauthorized response.
3. Map the Payload to the Content Model
The incoming JSON payload rarely matches your database schema exactly. The RankPine webhook delivers specific fields, including title, slug, metaDescription, sources, an images array, and optional markdown or html formatting. Your receiver translates these fields into the correct local format.
Choose one body format to render. Do not concatenate both the Markdown and HTML fields into the same post, as this creates duplicate text. Treat the first URL in the images array as the intended featured image, and map its provided alt text to your media library or database. Preserving the sources data during this translation ensures the live page retains its citations. Depending on your storage strategy, your receiver script might download the images to an Amazon S3 bucket and rewrite the URLs in the body text, or it might store the provided URLs directly. Finally, define defaults for fields that the payload omits; if your system requires an author ID, a category taxonomy, or a publication timestamp, the receiver needs to supply those fallback values automatically.
4. Persist the Article and Acknowledge the Write
Your endpoint must record the post or queue the background job durably before responding to the sender. Wrap the database insertion in a transaction so a partial failure rolls back the entire operation. Return a 2xx success code only after the data is safe in your database or repository. A receiver can optionally return the destination post ID and URL in its response, which RankPine records for tracking purposes.
Network interruptions or timeouts occasionally cause the sender to retry a delivery. Build your receiver with upsert or deduplication logic based on the incoming slug. The documented webhook payload provides a slug but no unique delivery-event ID. Checking the database for an existing slug before inserting a new row prevents a retried request from publishing a duplicate article. For complex writes that take several seconds, place the payload in an asynchronous message queue, immediately return a success code to the webhook sender, and process the database insertion in the background. This approach prevents the connection from timing out while the receiver formats the content.
5. Test and Monitor the Integration
Send a test payload to your endpoint and inspect the resulting page. Check the typography formatting, ensure the citation links resolve correctly, and verify that the featured image displays in the proper aspect ratio. Review your server logs to confirm the signature validation passed and the response code was sent within the expected timeframe. Tools that create secure tunnels to your local machine allow you to inspect the raw RankPine payload and step through the mapping code before deploying the receiver to production.
The WordPress integration supports setting the post status to Publish, Draft, or Pending. The custom webhook emits an article.published event. Unless you configure your receiver to default incoming webhook posts to a draft state, the content goes live immediately upon receipt. Confirm the provider's retry and replay behavior during testing, as RankPine's public guide does not specify an exact retry cadence for failed deliveries. Implement alerting for 400 Bad Request or 500 Internal Server Error responses so your team knows immediately if payload formatting changes or database connections drop.

Verify That the Published Page Is Discoverable
A successful 2xx acknowledgment from your webhook receiver confirms that the server accepted the data, but it does not prove a human can read the page or a crawler can index it. Once the automation runs, check the returned URL in a private browser window. The page must respond with a 200 OK status, render the expected text, load the images, and include a self-referencing canonical URL tag. Ensure the post is linked from your main blog feed or other internal pages so visitors can navigate to it organically. If your site uses a content delivery network, verify that publishing a new article automatically invalidates the cached blog index page.
A technically sound page is a prerequisite for eligibility in Google Search. The Google Search technical requirements say Googlebot must be able to access the page, it must return an HTTP 200 response, and it must contain indexable content. Meeting those conditions makes the page eligible for indexing.
Google's guide to generative AI features says its generative AI features rely on the standard Search index, so foundational Search requirements still apply. To be eligible for display in AI Overviews, a page must be indexed and eligible to appear in Google Search with a snippet, and the site must also be included in Search generative AI features in Search Console. Google says no special AI markup or an llms.txt file is needed to appear in its generative AI features. For ChatGPT Search, OpenAI recommends allowing the OAI-SearchBot in robots.txt and permitting requests from its published IP ranges to help a site appear in search results. Sites that opt out of OAI-SearchBot will not appear in ChatGPT Search answers, though they can still appear as navigational links. Allowing the crawler helps OpenAI surface a site in results, but does not guarantee inclusion in a particular answer.
Keep Automated Publishing Useful and Reviewable
API connections remove the friction of manual data entry, providing a predictable way to manage publishing operations. Automation handles the delivery mechanics, not the editorial judgment. Treating a daily schedule as a ranking shortcut often leads to poor site quality.
Before publication, check the facts, source links, and metadata. For AI-generated content, Google's guidance on generative AI content calls for manual fact-checking and review of the content, including its metadata.
Implement a review path for your automated content. If you use a CMS like WordPress, configuring the automation to post as Draft or Pending provides a staging area. You can review the claims, check the formatting, and approve the piece before it goes live. For a custom webhook receiver, you configure your backend to save incoming payloads as unpublished drafts. This keeps editorial approval upstream of the final public event.
Avoid configuring your automation to generate near-duplicate pages targeting slight keyword variations. Google's scaled content abuse policy penalizes sites that produce high volumes of unoriginal pages primarily to manipulate search rankings. A disciplined daily schedule works when it delivers distinct, helpful answers to reader questions. Evaluating whether to outsource blog writing vs using AI automation often comes down to maintaining this standard of distinct quality while increasing publishing frequency.
Troubleshoot Common API Publishing Questions
When a publishing integration fails, systematic troubleshooting isolates the cause. If the initial verification ping fails, inspect your endpoint reachability, HTTPS certificate, signature validation logic, and the HTTP response code. If your receiver acknowledges a request but no new page appears on your site, inspect the database persistence, field mapping, rendering templates, and URL generation rules. If duplicate posts appear, you need to add destination-side upsert or deduplication logic.
Can I Automate Posts Without WordPress or a CMS?
A custom website does not need WordPress or a traditional CMS API to accept automated posts. It does require a writable endpoint or a repository-triggered workflow. If you use a static site generator, you configure a webhook receiver to write the incoming JSON payload to a Markdown file in your repository, commit the change, and trigger a build process. The requirement is a server-side destination that knows what to do with the payload, regardless of the underlying software stack.
What Is the Difference Between an API and a Webhook?
An API is an interface your client calls to request or modify data. A webhook reverses this relationship by pushing an event to a receiver you control. When managing retail content, a tool like the Shopify Auto Blog Poster Plugin might use the platform's native API to push data actively. With RankPine's custom site integration, RankPine uses a webhook to push the article.published event and payload to your server. Your server passively listens for this webhook rather than actively polling RankPine for new content.
How Can I Prevent Duplicate Posts or Missed Deliveries?
Network timeouts sometimes prompt a webhook provider to resend a payload. Deduplication logic on your server prevents these retries from creating identical pages. Do not rely on a unique delivery-event ID if the provider does not document one. Instead, use the article slug as a unique identifier. Configure your database or receiver script to update the existing record if the slug already exists, or ignore the request if the content matches. Confirm the specific retry behavior with your provider so you know how long to wait before investigating a missed delivery.
What If My Website Has No Publishing API?
If your custom frontend relies entirely on manual deployments and lacks a server-side component to receive data, you have three options. First, you can build a lightweight Node.js or Python receiver to process the webhook and update your database. Second, you can implement a repository-triggered workflow using an automation platform to accept the payload. Third, you can bypass your custom frontend entirely and use the RankPine Hosted Blog. This places the content on a separate subdomain managed by RankPine, removing the need for a local publishing API.
Does API Publishing Guarantee Search Visibility?
Publishing an article via an API only guarantees that the file exists on your server. It does not guarantee indexing or AI-search visibility. Search crawlers evaluate the resulting page based on its technical accessibility, internal linking, and content quality. A fast, automated delivery mechanism provides operational efficiency, but the page must still meet the baseline standards for performance and usefulness to earn search traffic.
RankPine automates the entire content lifecycle, from keyword research to publishing verified, cited articles directly to your CMS or custom webhook receiver every day. Ready to build compounding organic traffic without the manual drafting? Explore RankPine and start scheduling your content today.